Top-roping
Welcome!
Welcome to top-roping module level 1! In this course you will learn:
- Tying the Rope
- How to Belay
- Safety Checks
- Belay Test

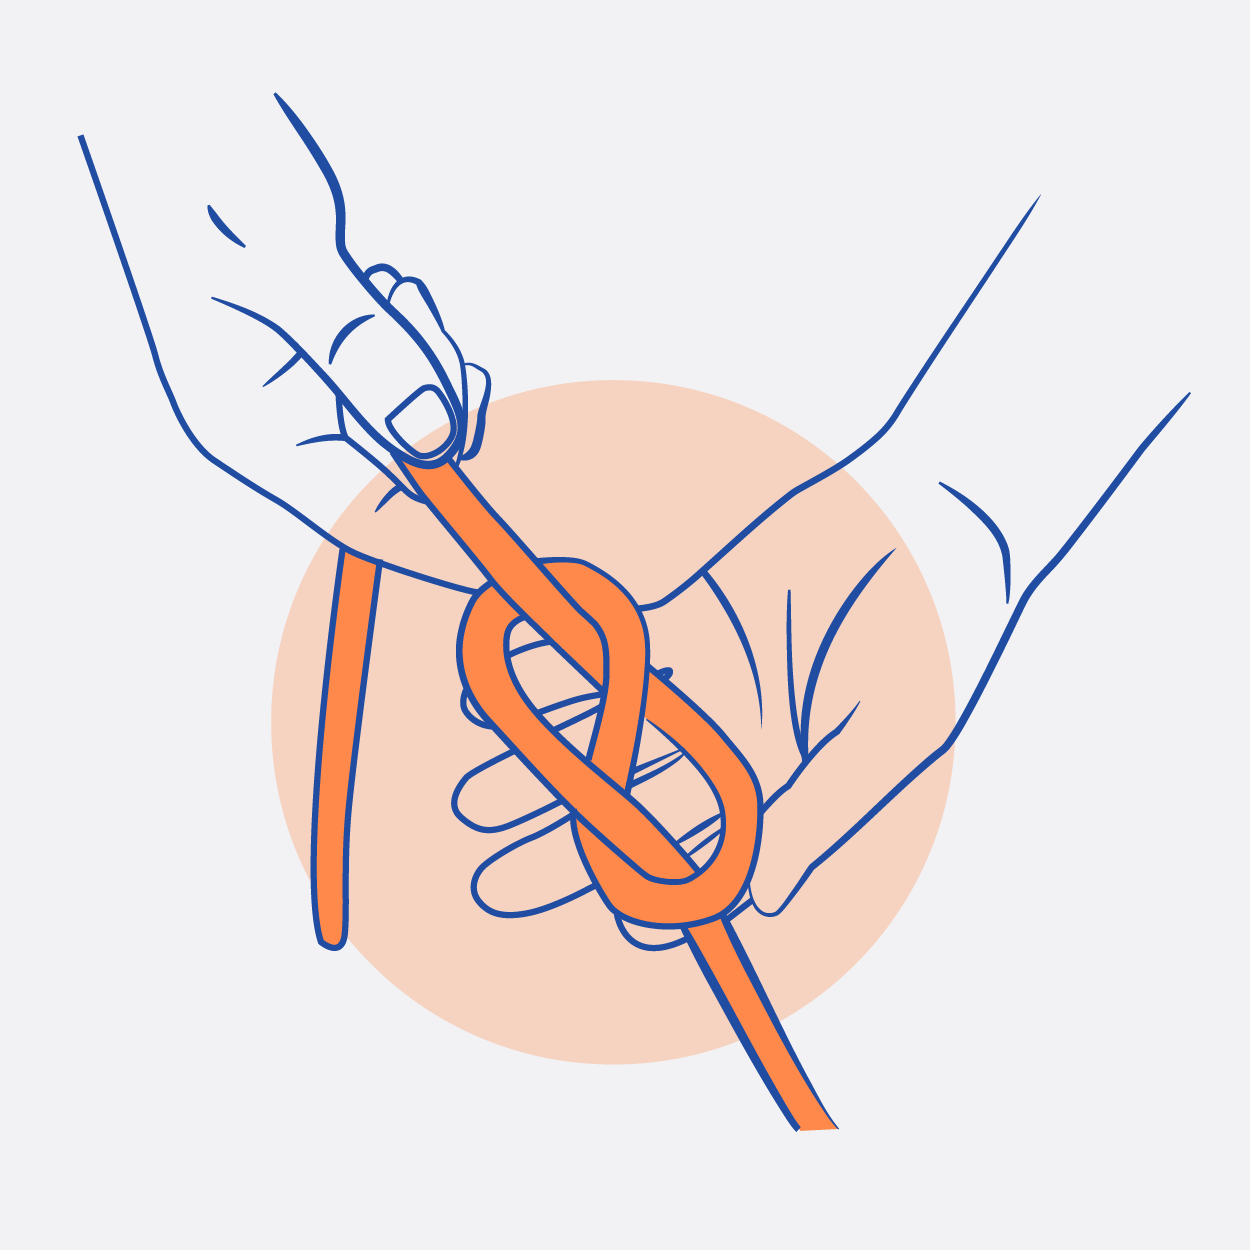
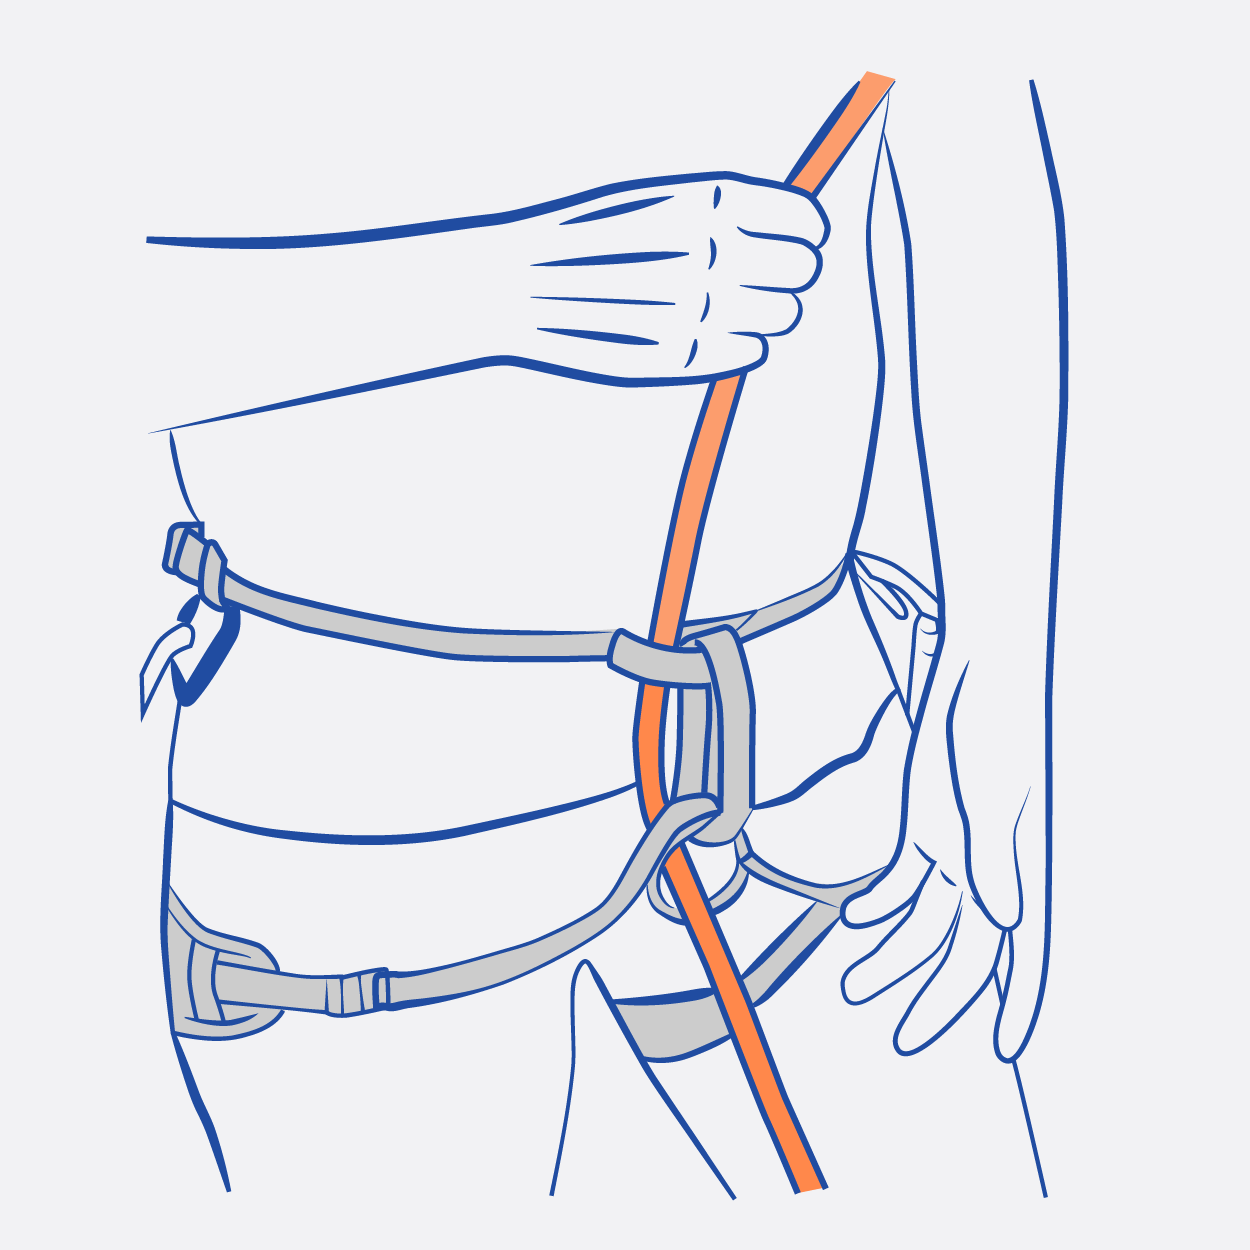
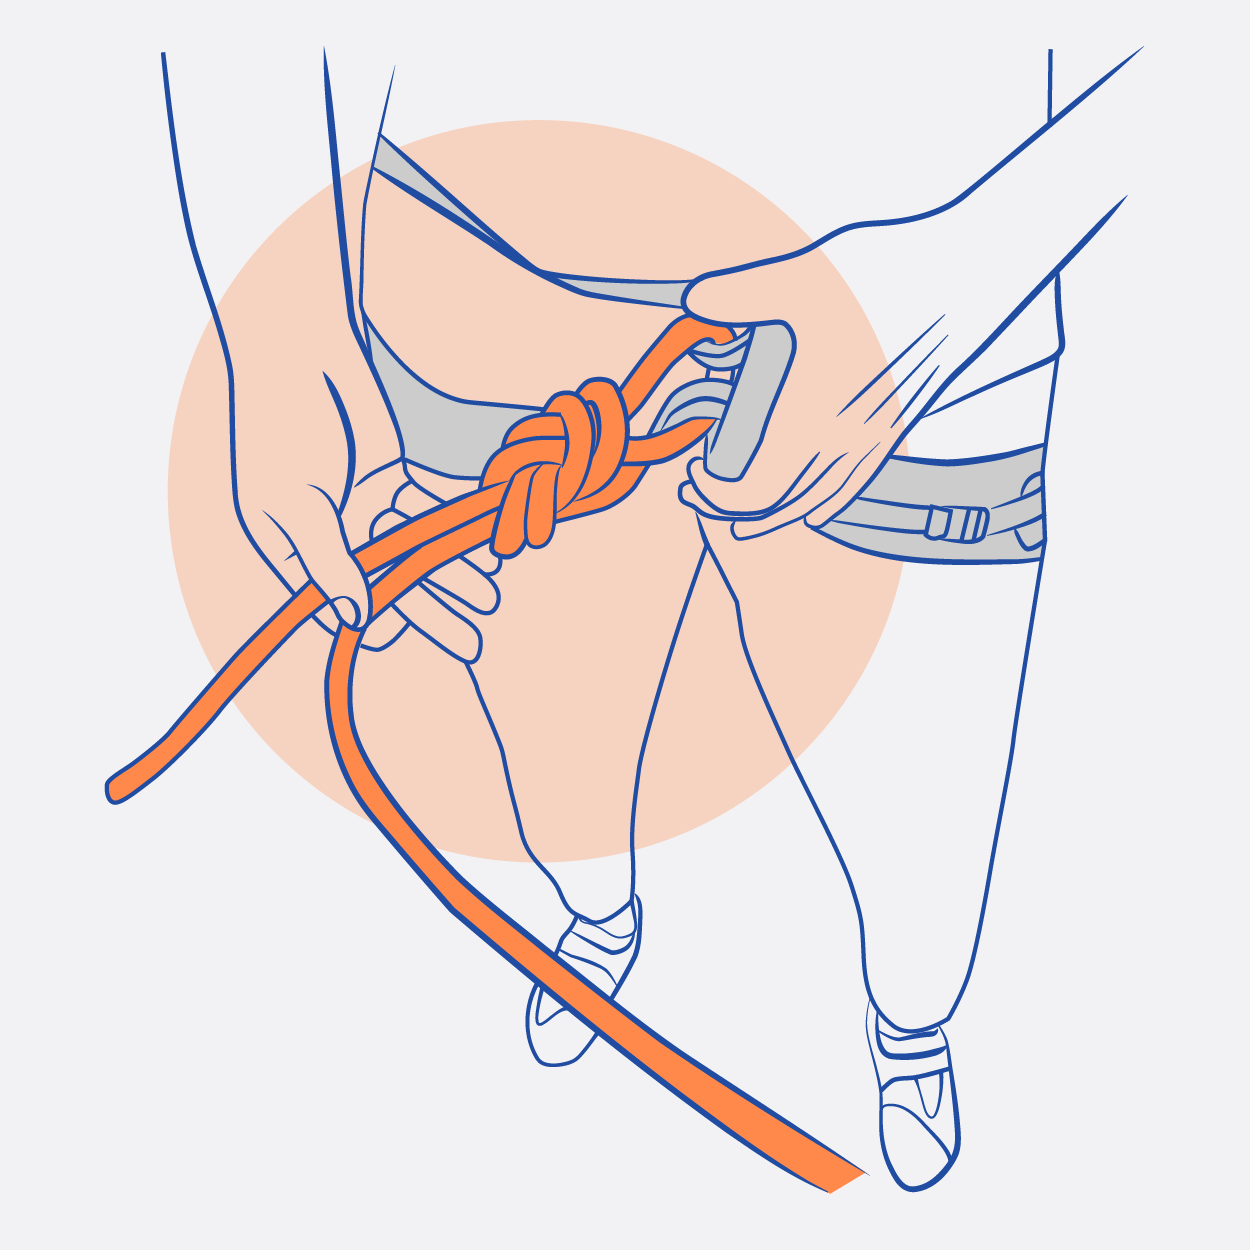
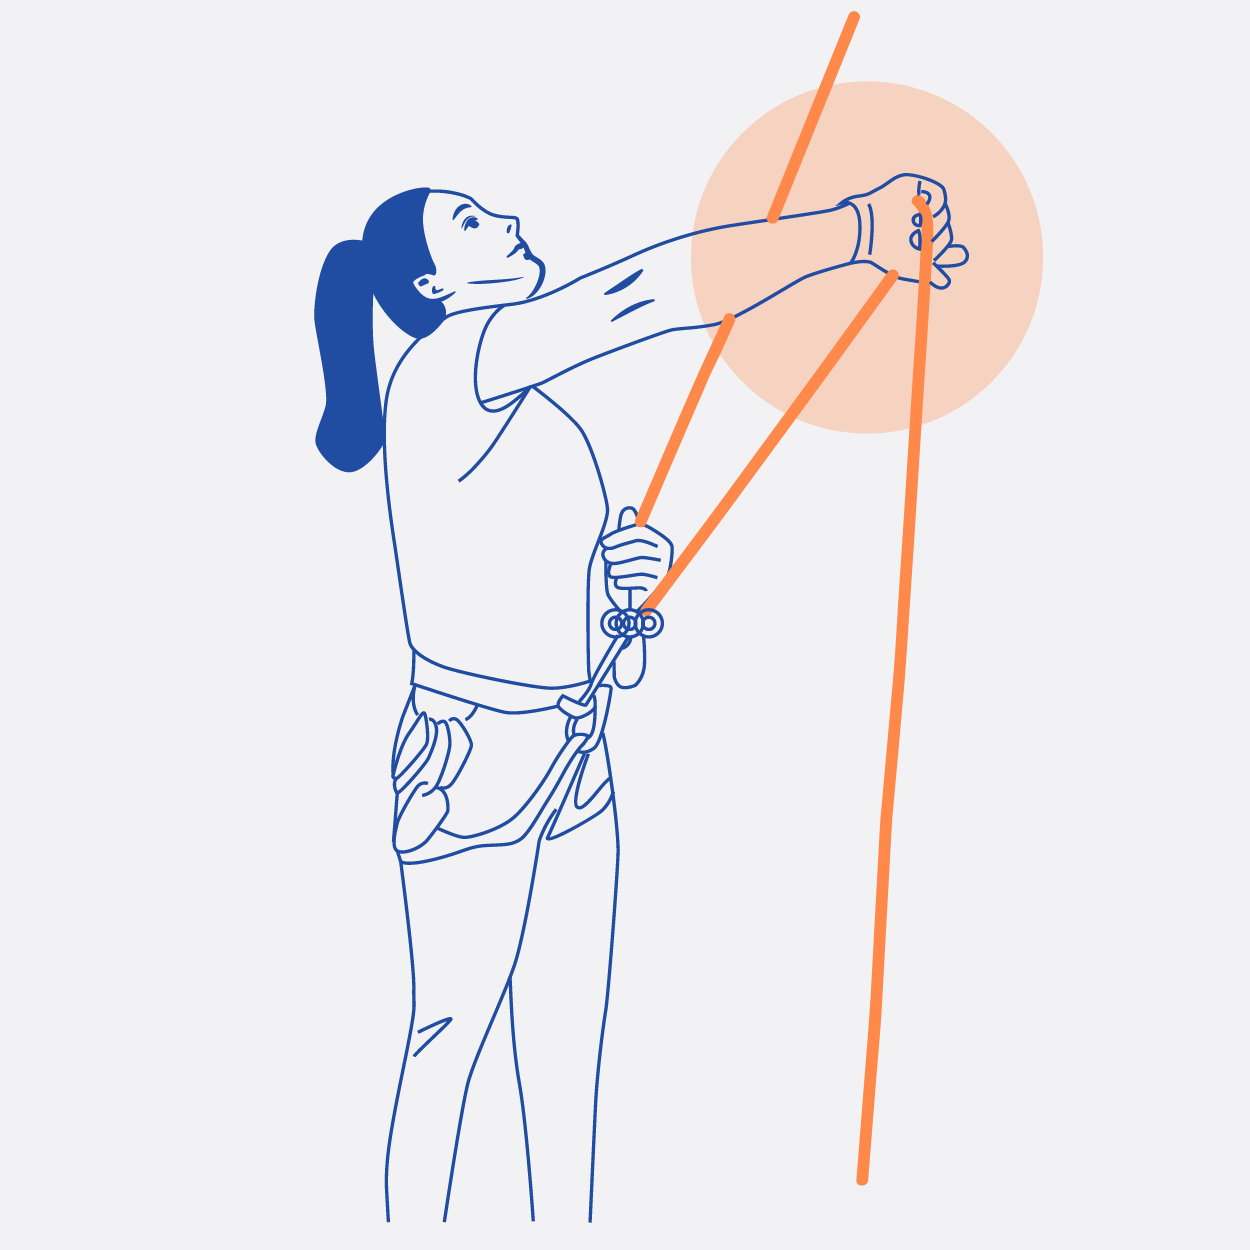
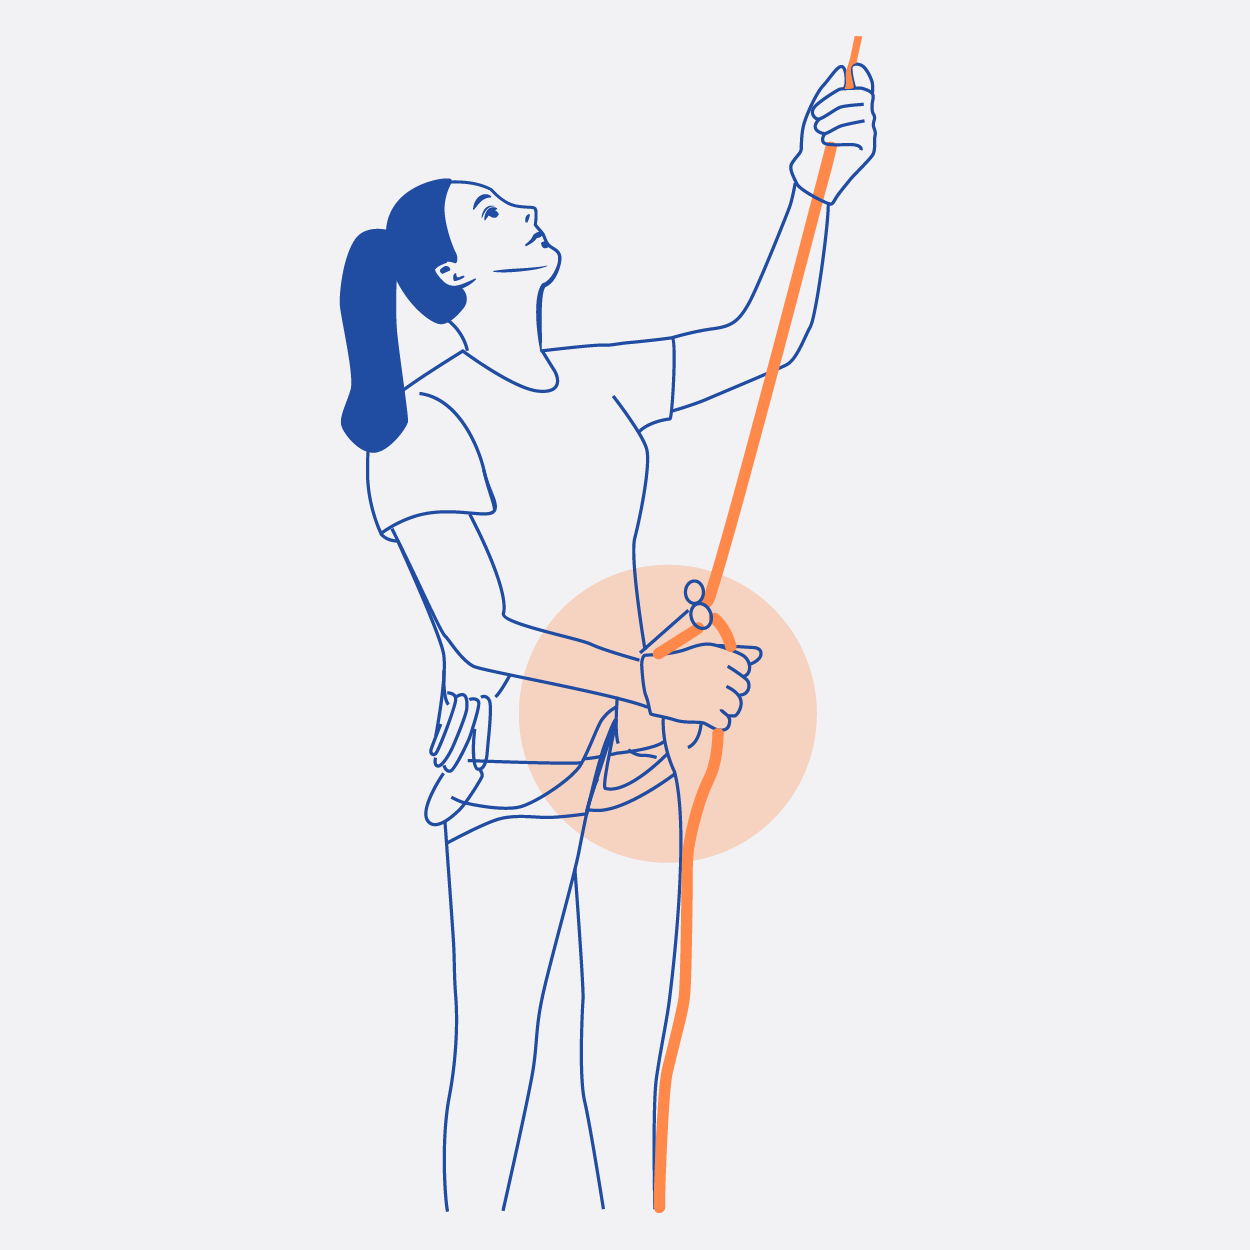
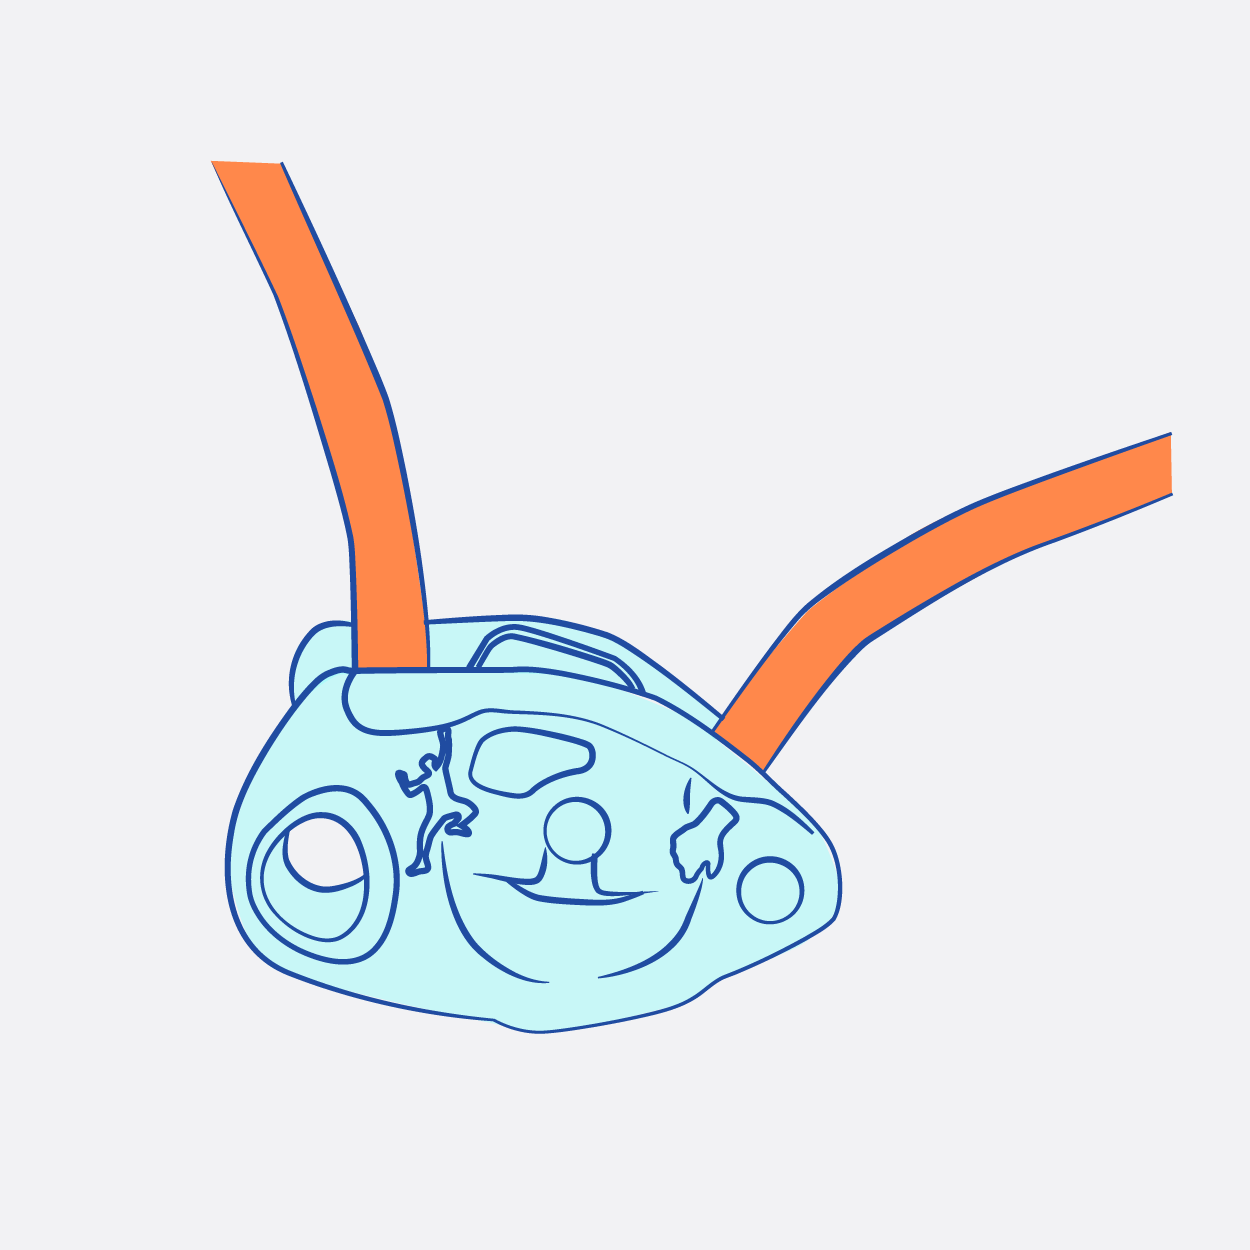
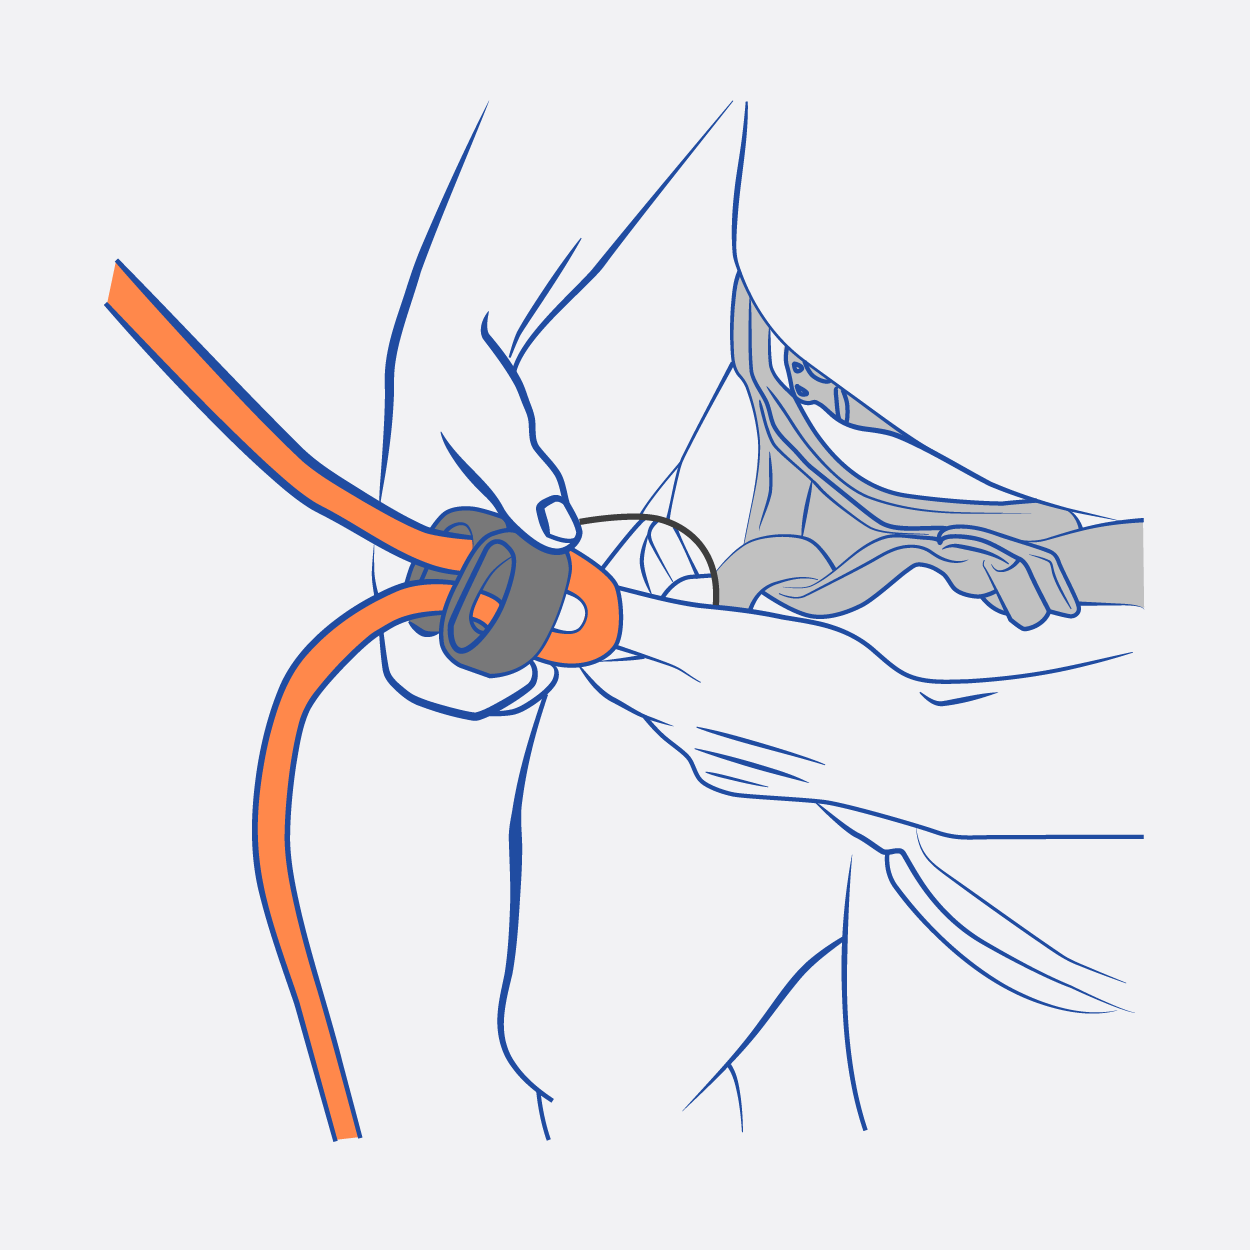
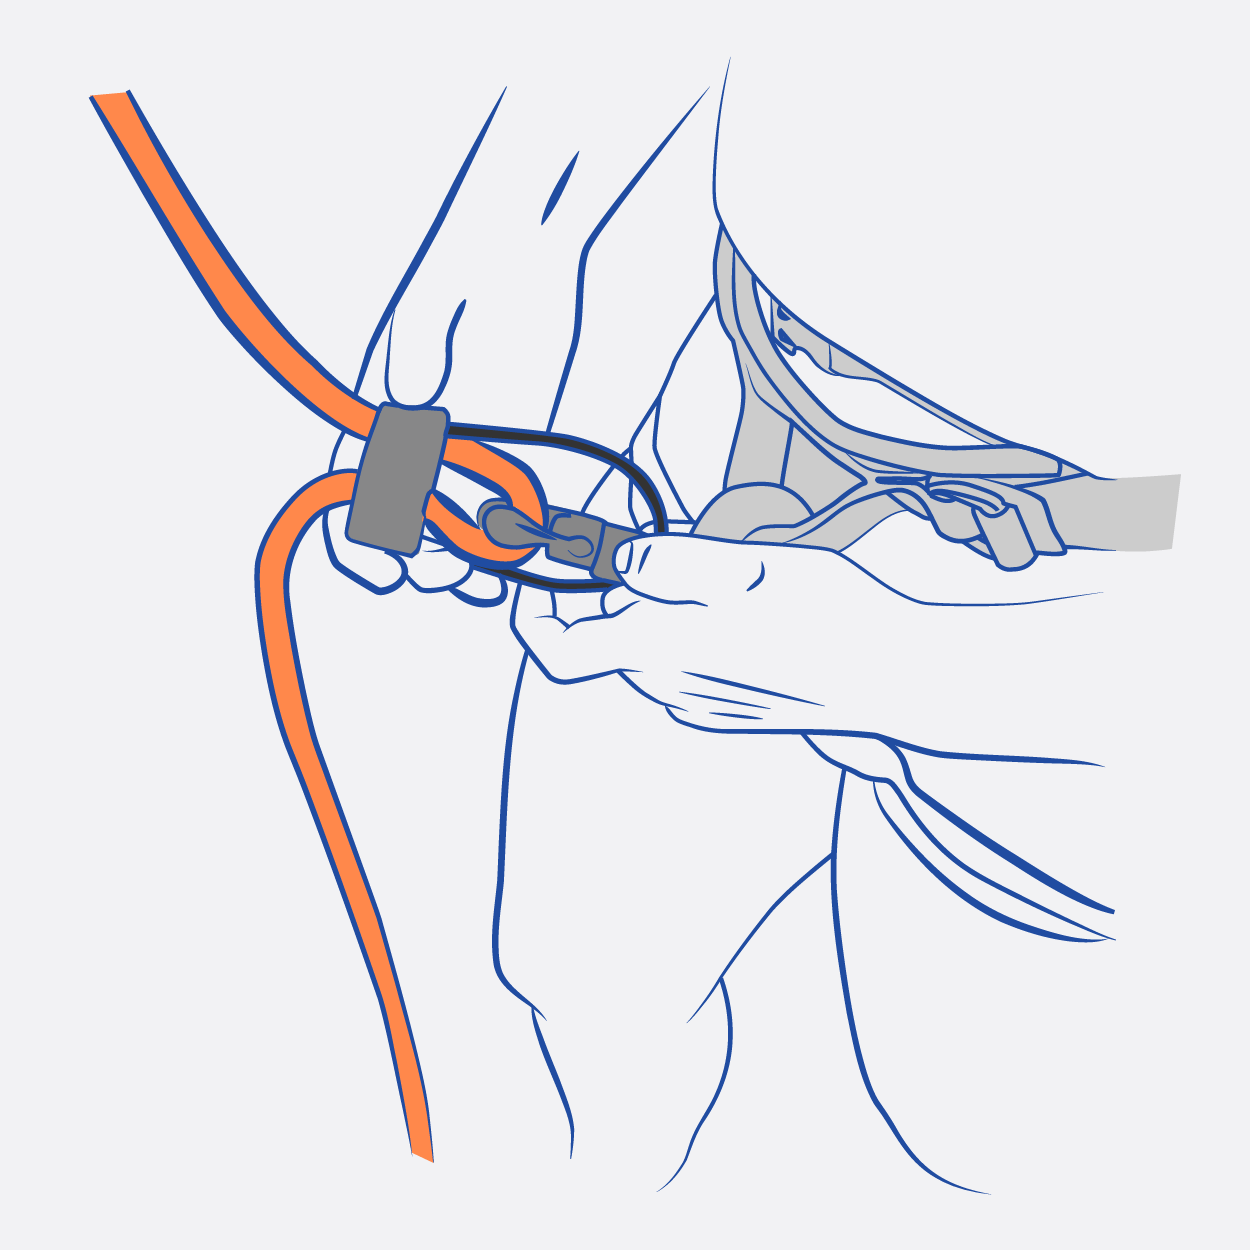
1. Tying the Rope
When top-roping the climber will have to tie a “figure 8 follow-through knot” after the rope is fed through both loops of the climber’s harness. The first step is to take an arm’s length of rope, and next tie a basic figure 8 knot. Then, pull the end of the rope through both harness loops, and finally follow the extra rope through the original figure 8 knot to create 10 parallel lines.
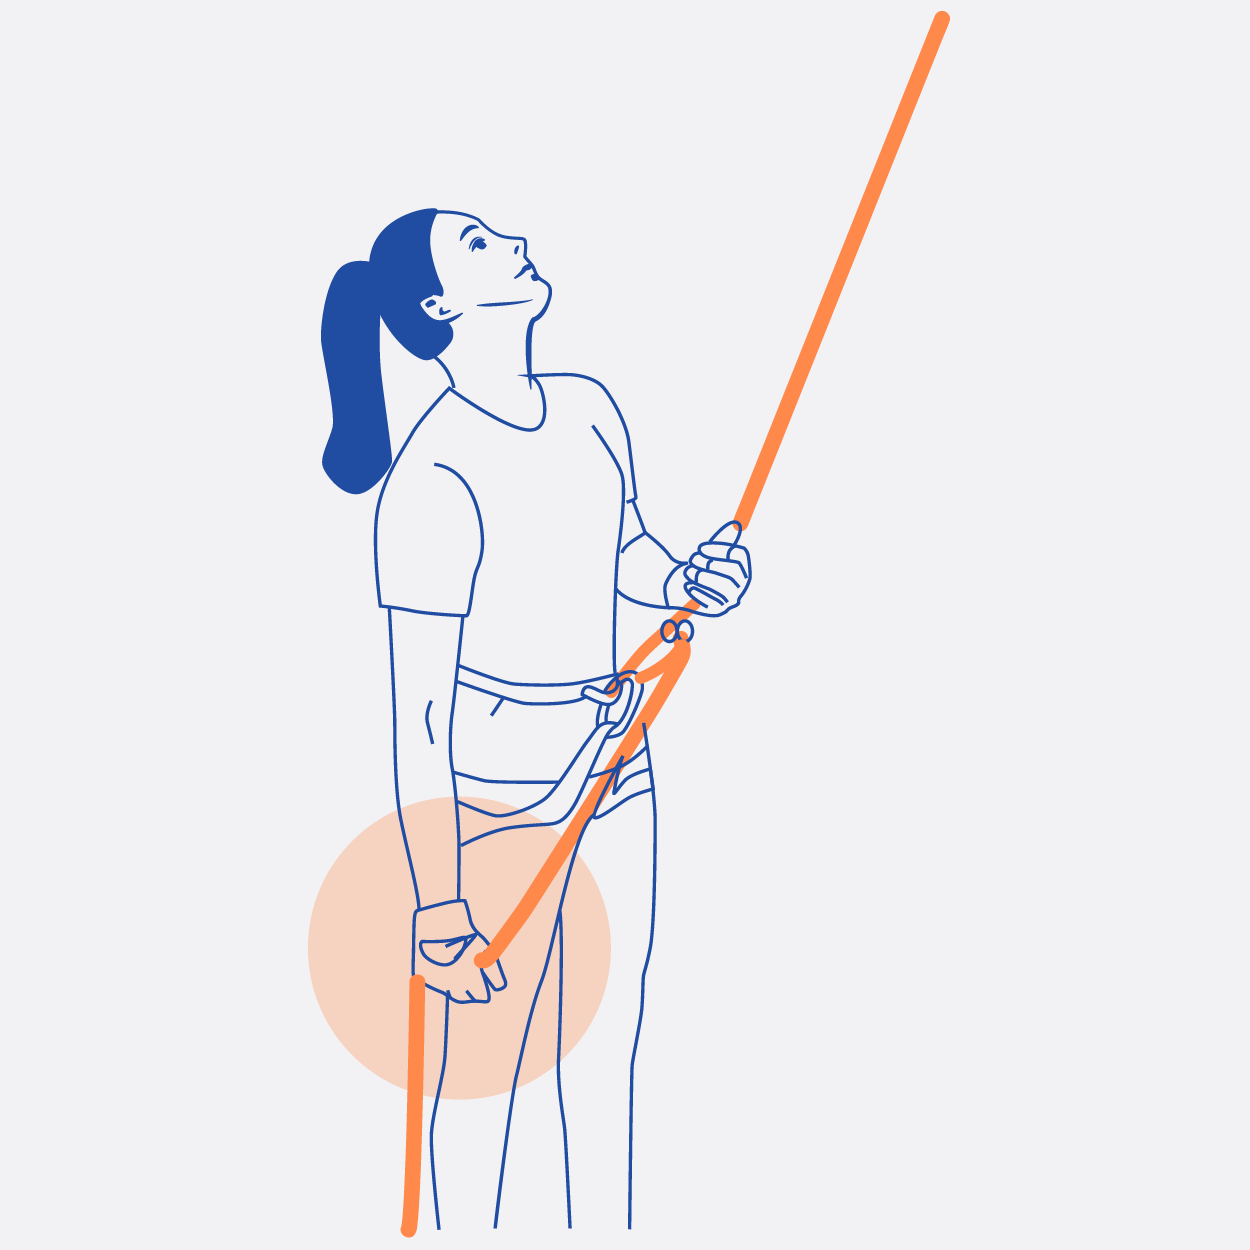
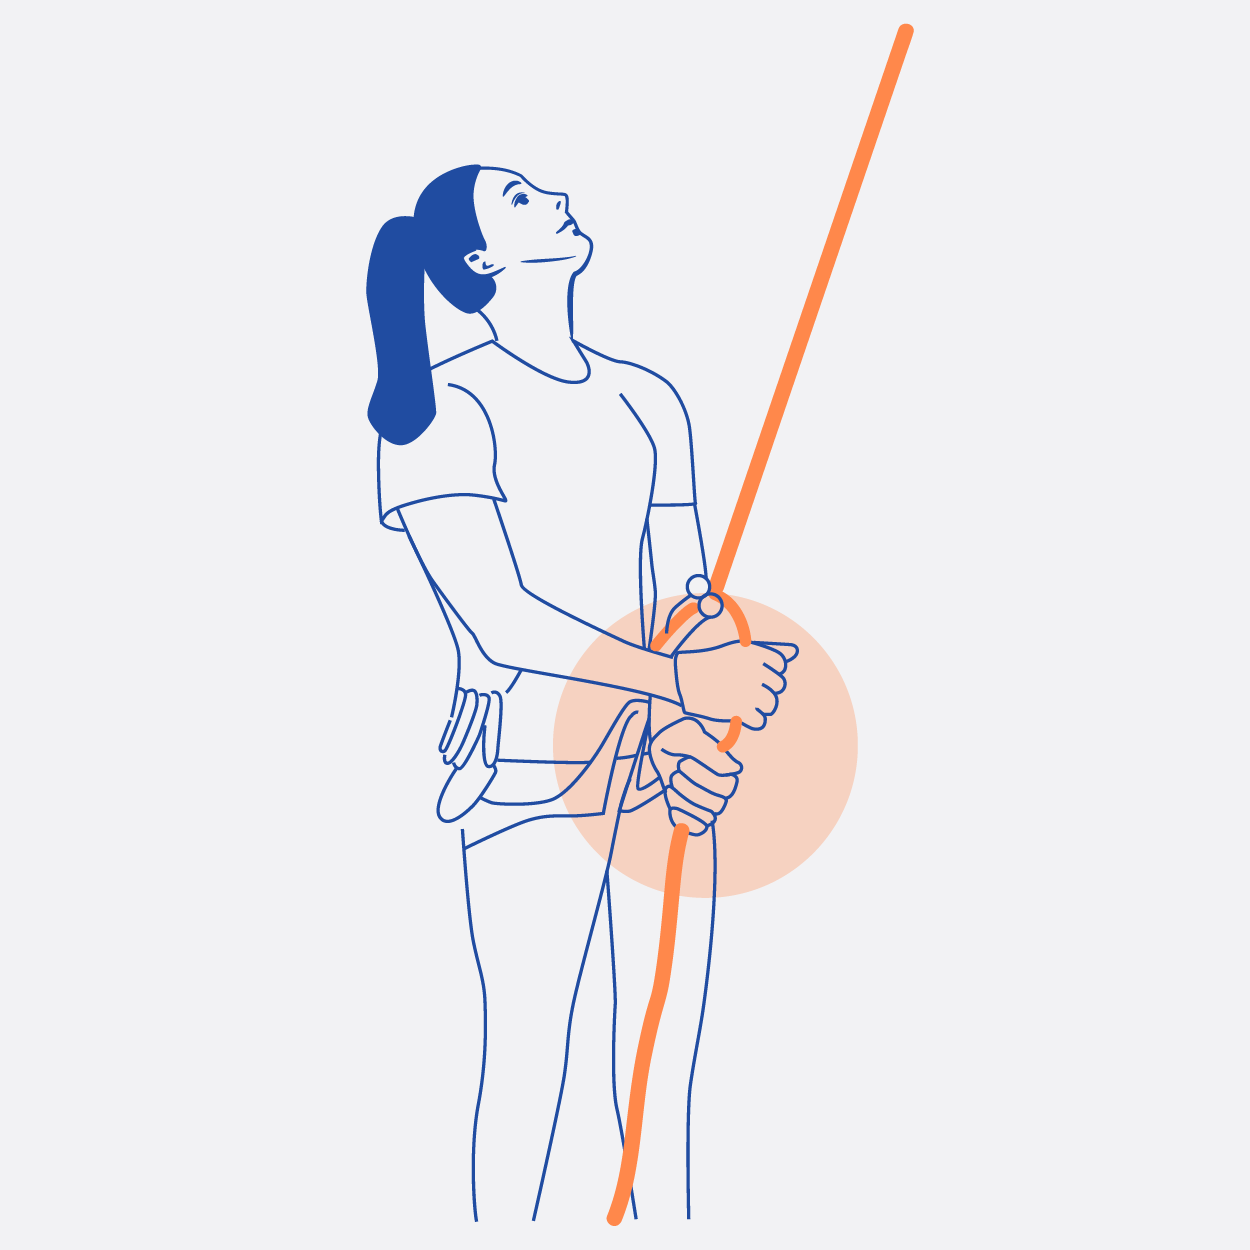
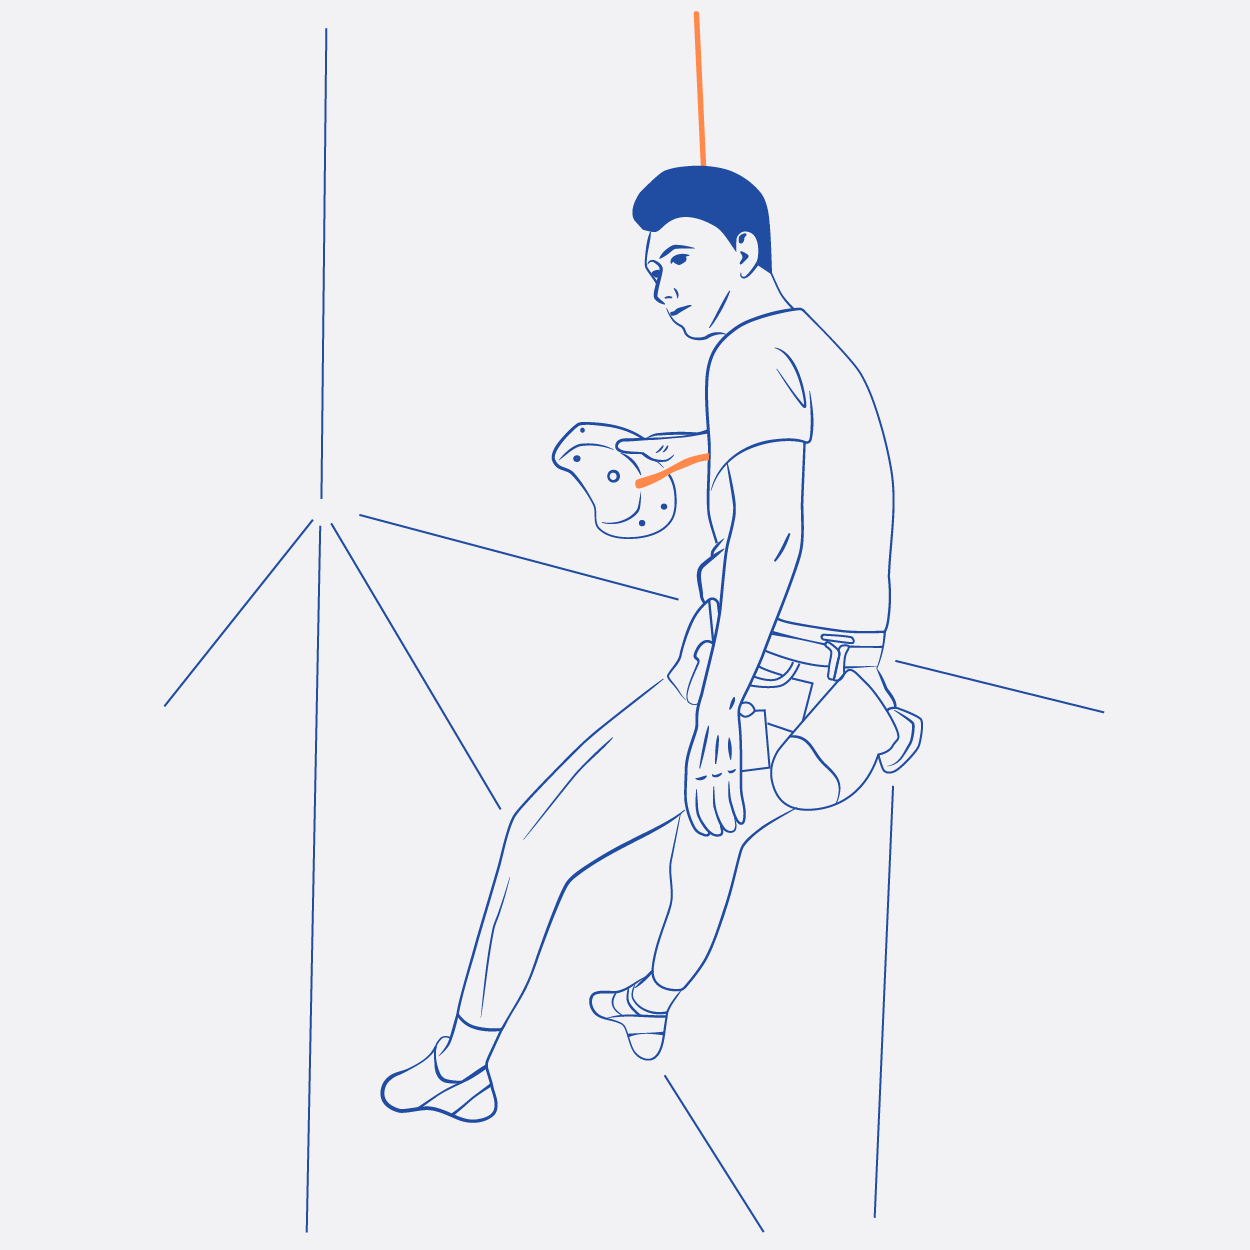
2. How to Belay
Belayers follow a system called PBUS which stands for, “pull, brake, under, slide”. It is detrimental when belaying that your brake hand (on the bottom rope) never leaves the rope.
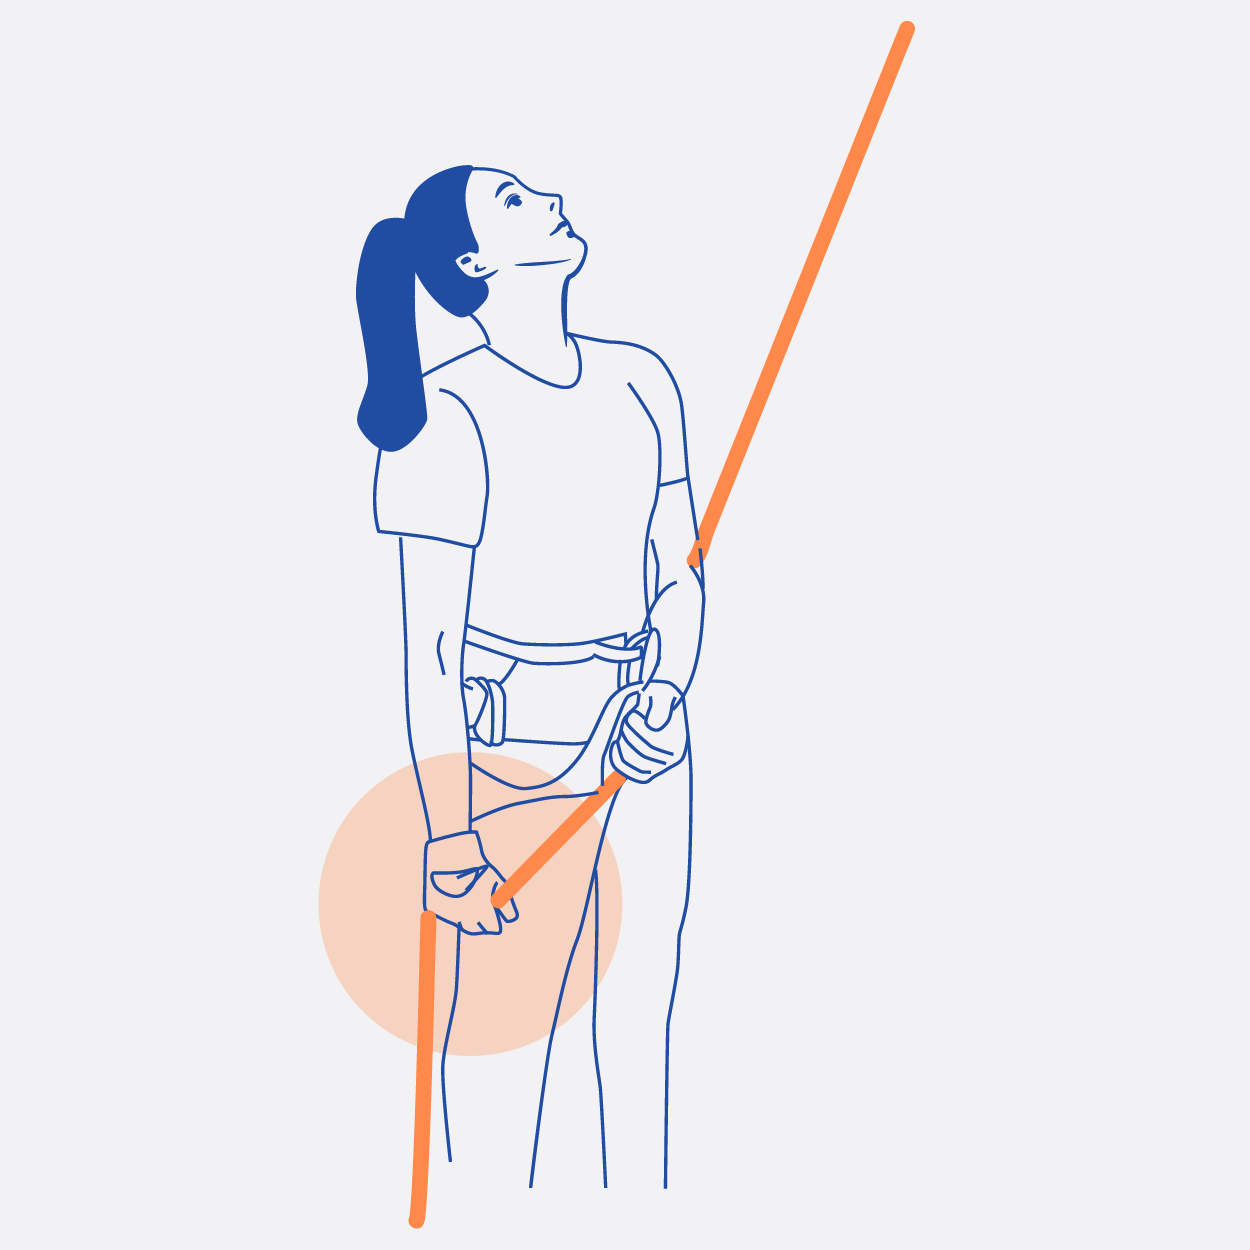
To give your climber a break or a “take”, take in the extra slack and place both hands on the bottom rope.
When catching your climber, sit back into your harness and place both hands on the bottom rope to break. If the climber is a lot heavier than the belayer, there are usually weight bags that belayers can clip to their harnesses to avoid being shot upward after a climber falls.
To lower a climber, take in all of the slack, place both hands on the bottom rope and slowly feed the rope upwards as the climber comes down.
3. Safety Checks
Before starting a climb, it is necessary to complete a series of safety checks.
For the climber:
For the Belayer:
4. Belay Test
You will need to pass a belay test before being certified at a climbing gym.
Climbing Lingo:
Climber: Climbing? = Can I climb?
Belayer: Climb on. = All the safety checks have been performed and I am paying attention.
Climber: Take! = Take in all of the slack and hold me.
Belayer: Got! = I have taken all of the slack in and you can sit back.
Climber: Lower? = I’m ready to come down.
Belayer: Lowering! = I’m lowering you.
Climber: Up-rope! = Take in the slack, the rope is too loose
Climber: Slack! = Feed some rope up, the rope is too tight.
To pass this test you will need to:
Tie a figure 8 knot
Perform all safety checks out load
Use all of the correct climbing lingo with your partner
Belay, take, catch, lower, give and take slack.
To pass this test you will need to:
Test Your Skills!
Collect badges on your profile page and unlock a prize when you successfully complete all 3 top-roping tests.